
What Is Post-Frame Construction? How Pole Barns Are Built
Post-frame construction is the building method behind every pole barn, and once you understand how it works, it’s easy to see why this system has been a go-to choice for agricultural, residential, and commercial builders for generations. If you’ve been researching pole buildings and want to understand what actually makes them different from the way most homes and structures are built, this is the guide for you.
We’re going to walk through the whole thing: how the system works, what every component does, how post-frame compares to stick-frame, and what makes engineered post-frame buildings different from more basic versions. No costs, and no size recommendations, just a clear, honest look at the construction method itself.
The Core Idea Behind Post-Frame Construction
Most buildings you encounter in everyday life, from houses, to office buildings, and retail stores, are built using stick-frame construction. In a stick-frame building, the structural load is distributed across a large number of closely spaced wood studs, typically set 16 or 24 inches apart. Those studs run from the foundation to the roof, and the whole system depends on that network of components working together.
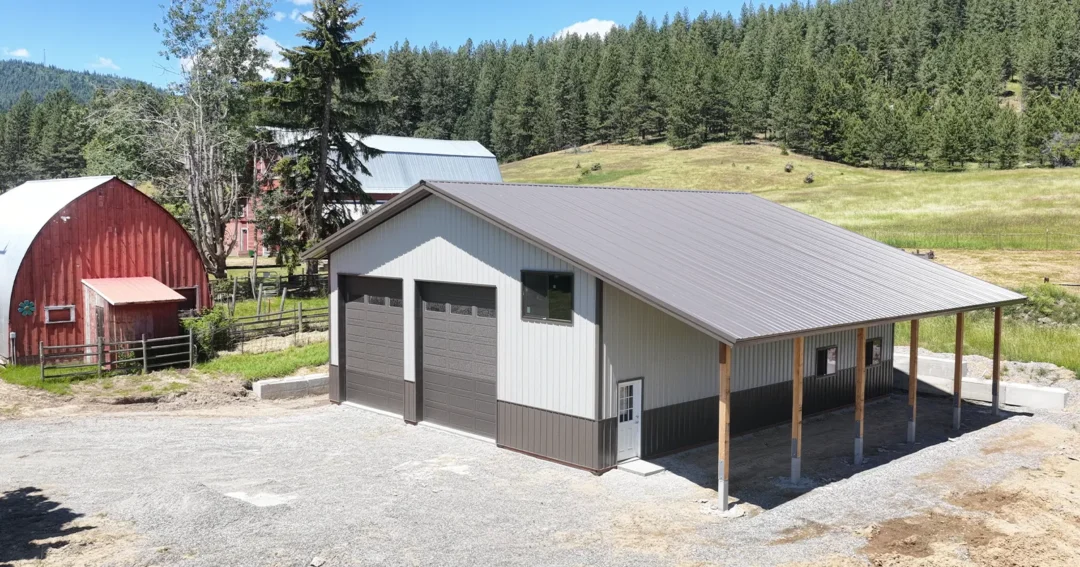
Post-frame construction works differently. Instead of many small studs, the building is supported by a smaller number of large, heavy-duty vertical posts spaced much further apart; often 8 to 12 feet on center. Those posts carry the structural load of the roof and walls directly to the ground. Because the posts do the heavy lifting, you don’t need the same network of closely spaced framing members, and you don’t need a full perimeter concrete foundation.
The result is a structure that goes up faster, costs less per square foot, and delivers a wide open interior with minimal obstructions. That’s the fundamental advantage of the post-frame system.
Many types of buildings are created using post-frame construction, We’ve dedicated a separate article to the types of post-frame buildings.
How Post-Frame Construction Works: Step by Step
Let’s walk through the construction sequence so you can see how the whole system comes together from the ground up.
Step 1: Site Preparation and Layout
Before any posts go in the ground, the site needs to be properly prepared. This means clearing the building footprint, grading the ground for drainage, and laying out the exact locations of each post. Getting the layout right at this stage is critical because the post spacing determines how the entire structure is framed.
Site prep also includes any necessary gravel work under where the concrete floor will eventually go, and planning for where utilities (electrical conduit, water lines, etc.) will enter the building.
Step 2: Setting the Posts
The posts are the foundation of the entire system. In traditional post-frame construction, the posts are set directly into the ground, typically 4 to 6 feet deep depending on the height of the building and local frost depth requirements. The hole is augered, the post is set plumb, and the hole is backfilled with concrete or compacted gravel.
The posts themselves are almost always laminated lumber (multiple layers of dimensional lumber fastened together) to create a post with the load capacity needed for the structure. Some builders also use round timber poles, which is where the common name ‘pole barn’ originally came from.
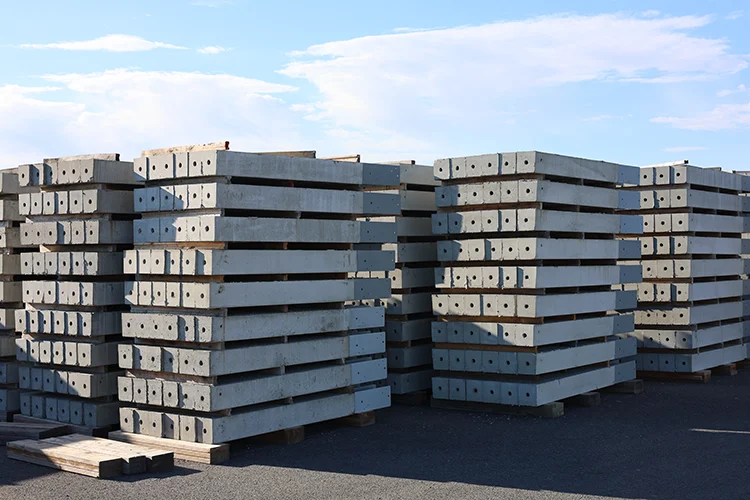
An important variation worth knowing: rather than burying the wood post in the ground, some builders like Steel Structures America use precast concrete column systems (like Perma-Column) that keep the wood above the soil line. Since direct contact between wood and soil is the primary cause of post rot over time, these systems can significantly extend the life of the building.
Step 3: Splash Boards
Once the posts are set, pressure-treated splash boards (also called skirt boards) are attached along the base of the wall between the posts at grade level. These boards seal the base of the building and help protect the posts and lower structure from moisture. They’re always pressure-treated since they’re in direct contact with or very close to the ground.
Step 4: Wall Girts
Girts are the horizontal framing members that run between the posts along the exterior walls. Think of them as the horizontal equivalent of studs. They give the wall its structure and create a fastening surface for the siding panels. Girts are typically dimensional lumber, commonly 2×6 or 2×8, and they’re spaced vertically at regular intervals up the wall.
In some post-frame buildings, the girts are notched directly into the outside face of the posts (called bookshelf girts or notched girts). In others, they’re face-mounted on the inside of the posts. The method affects how the wall is insulated and finished, so it’s worth understanding which approach your builder is using.
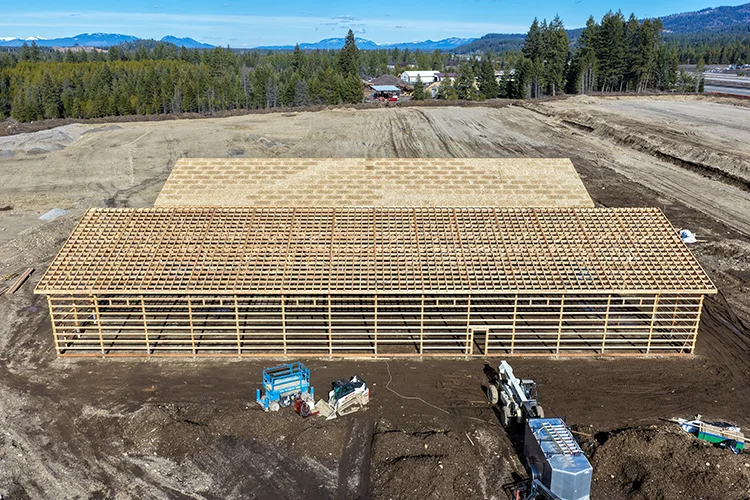
Step 5: Roof Trusses

The roof trusses are engineered wood assemblies that span the full width of the building from one side to the other. In a post-frame building, the trusses sit directly on top of the posts, transferring the roof load straight down through the posts to the ground. This is one of the key reasons post-frame buildings can achieve such large clear-span interiors. The trusses can span the full width without needing interior support columns.
Post-frame trusses are typically custom engineered for each building based on the span, roof pitch, local snow load requirements, and intended use. This is why getting engineered drawings is important, especially for larger structures.
Step 6: Roof Purlins
Once the trusses are set, roof purlins are installed across the top of the trusses, running parallel to the length of the building. Purlins are the horizontal members that the metal roofing panels will eventually be attached to. Like girts on the walls, purlins create the fastening surface for the roof cladding.
Purlin spacing is typically determined by the roofing panel manufacturer’s specifications and the local snow load requirements.
Step 7: Roofing and Siding Panels
With the frame complete, metal roofing and siding panels are attached to the purlins and girts. Metal panels are the standard exterior finish for post-frame buildings. They’re durable, low-maintenance, and available in a wide range of colors and profiles.
Roofing panels are installed starting from the eave and working toward the ridge. Siding panels are installed starting from one corner and working across the wall. Trim pieces, flashing, and ridge caps are installed to seal all the transitions and edges.
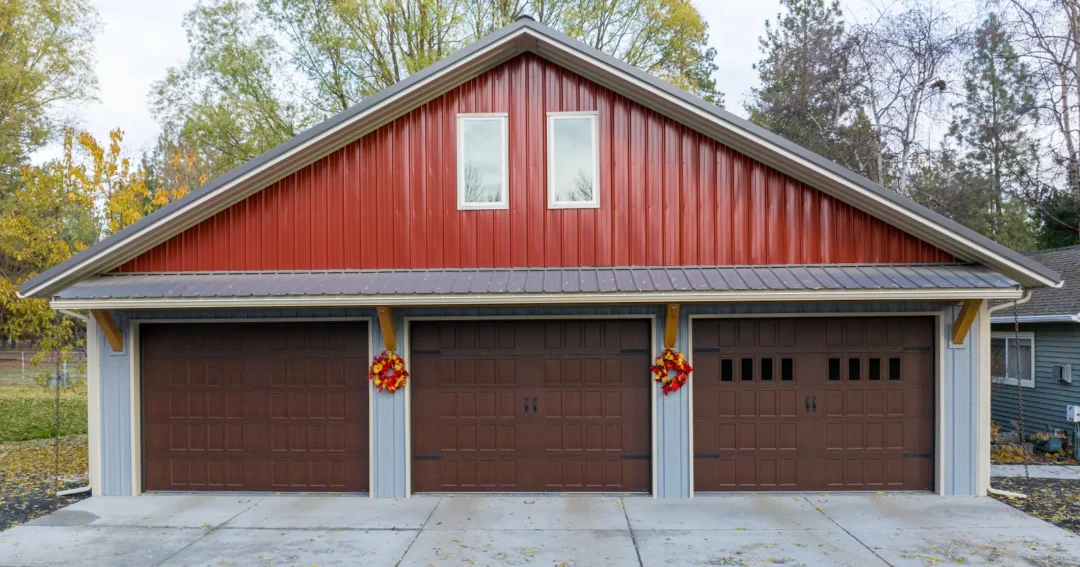
Step 8: Doors, Windows, and Overhead Access
Overhead garage doors, entry doors, and windows are framed in during construction using headers and trimmers built into the post-frame system. The framing for large openings, like a 12-foot or 14-foot tall overhead door, is integrated into the structural design of the building rather than added as an afterthought.
Step 9: Concrete Floor (Where Applicable)
In many post-frame buildings (particularly garages, shops, and barndominiums) a concrete slab is poured after the building is enclosed. This gives you a clean, durable floor surface. Agricultural buildings used for hay storage or livestock may use a gravel or dirt floor instead, depending on the intended use.
The Components of a Post-Frame Building
Here’s a reference table showing every major component in a typical post-frame building, what it does, and what it’s made of.
| Component | What It Does | Common Materials |
| Structural Posts | Bear the primary load of the roof and walls | Laminated lumber, round timber, engineered columns (e.g., Perma-Column precast base) |
| Splash Board / Skirt Board | Bottom wall board that sits at grade; protects posts and seals the base | Pressure-treated lumber |
| Wall Girts | Horizontal members running between posts on the walls; create the surface for siding attachment | Dimensional lumber, typically 2×6 or 2×8 |
| Roof Purlins | Horizontal members running across the top of the trusses; create the surface for roofing attachment | Dimensional lumber |
| Roof Trusses | Span the full width of the building; carry the roof load to the posts | Engineered wood trusses |
| Ridge Board / Ridge Cap | Runs along the peak of the roof; ties the trusses together at the top | Dimensional lumber or metal ridge cap |
| Metal Roofing Panels | Exterior roof surface; sheds water and provides weather protection | Steel panels with painted or Galvalume finish |
| Metal Siding Panels | Exterior wall surface; provides weather protection and appearance | Steel panels with painted finish |
| Overhead Doors | Provide access to the interior; sized based on what needs to fit through | Steel sectional doors in a range of heights |
| Entry Doors and Windows | Personnel access and natural light | Steel or fiberglass entry doors; vinyl or aluminum windows |
| Concrete Floor (optional) | Interior ground surface; standard in garages and shops, optional in agricultural buildings | Poured concrete slab, typically 4-6 inches thick |
Post-Frame Construction vs. Stick-Frame Construction
The most common question people ask when learning about post-frame construction is how it compares to stick-frame (the method used in most residential homes). Here’s a side-by-side look at the key differences.
| Factor | Post-Frame Construction | Stick-Frame Construction |
| How the load is carried | Large vertical posts carry roof and wall loads | A network of closely spaced studs (typically 16″ or 24″ on center) carries loads |
| Foundation requirement | Posts set in ground or on concrete footings; no full perimeter foundation required | Typically requires a full perimeter concrete foundation |
| Interior columns | Wide clear-spans possible; minimal or no interior columns | Interior load-bearing walls may be needed for longer spans |
| Construction speed | Faster; the frame goes up quickly with fewer pieces | More components; takes longer to frame |
| Cost per square foot | Generally lower, especially for larger structures | Generally higher due to foundation and framing complexity |
| Best applications | Agricultural, commercial, shops, barndominiums, large garages | Residential homes, smaller buildings, structures where full foundation is required |
| Insulation approach | Requires careful planning; vapor barriers important | Standard batt insulation between studs |
| Building permits | Required in most jurisdictions; engineering drawings often needed for larger structures | Required; standard residential code applies |
The short version: post-frame construction is faster, more cost-effective at larger scales, and produces a wider clear-span interior. Stick-frame is more familiar to residential builders and is often required by code for certain residential applications. For shops, barns, agricultural buildings, and large garages, post-frame almost always wins on efficiency and cost.
What Makes a Post-Frame Building ‘Engineered’?
You’ll sometimes hear the term ‘engineered post-frame building’ used to describe a higher-spec version of the system. Here’s what that actually means.
All post-frame buildings involve some degree of engineering. The trusses are almost always designed by a structural engineer, and post embedment depth is calculated based on soil conditions and building height. But when someone refers specifically to an ‘engineered post-frame building,’ they typically mean:
- The structural design has been stamped and certified by a licensed structural engineer.
- The building is designed to meet specific local load requirements (snow load, wind load, seismic zone).
- All connection details — post-to-truss, truss-to-purlin, girt-to-post — are specified in the engineering drawings.
- The building qualifies for a building permit and passes inspection in jurisdictions that require engineered drawings.
For larger buildings, commercial applications, or any structure that will be used for human occupancy (like a barndominium or shop with living quarters), engineered drawings are typically required. Even for agricultural buildings and shops, having engineered plans is a smart investment. It protects you if you ever need to refinance, sell the property, or make an insurance claim.
Common Misconceptions About Post-Frame Construction
‘Pole barns are just cheap ag buildings.’
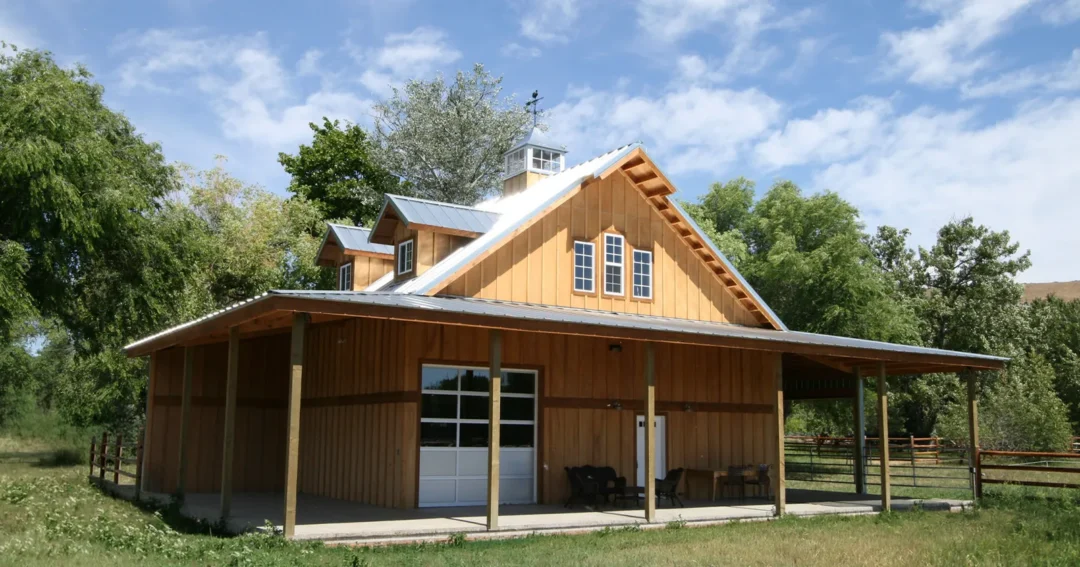
This one is outdated. Post-frame construction is used today for everything from basic hay barns to fully finished barndominiums with high-end interiors, insulated commercial warehouses, and contractor shops with multiple overhead doors. The construction method is highly adaptable and the quality of the finished building depends on how it’s designed and what goes into it.
‘The posts will rot out.’
This is a real concern with traditional in-ground wood posts, but it’s manageable. Modern pressure-treated lumber is rated for ground contact and is designed to resist rot and insect damage. Using concrete collars around posts, ensuring proper drainage around the building footprint, and choosing the right treatment rating for your climate all make a significant difference. And for buyers who want to eliminate this concern entirely, concrete column systems like Perma-Column keep the wood post above the soil line entirely.
‘Post-frame buildings can’t be insulated or finished.’
Not true at all. Post-frame buildings can be insulated using spray foam, rigid board, batt insulation, or a combination of methods. They can be finished with drywall, wood paneling, steel liner panels, or any other interior finish material. Barndominiums are a prime example of fully finished post-frame buildings with residential-quality interiors.
‘You don’t need a permit for a pole barn.’
In most jurisdictions, you do. Especially for any building over a certain size, or any building that will include electrical, plumbing, or be used for occupancy. Requirements vary by county and state, so always check with your local building department before you start.
Why Post-Frame Construction Has Stood the Test of Time
Post-frame construction is genuinely one of the most efficient building systems ever developed. The fact that it’s been in widespread use for decades, and that it continues to grow in popularity for residential, agricultural, and commercial applications, isn’t an accident.
The combination of large clear-span interiors, fast construction timelines, lower cost per square foot, flexibility in design, and the ability to build without a full perimeter foundation gives post-frame a real edge for a wide range of projects. Add in the ability to finish these buildings to a high standard with modern insulation systems, interior finishes, and HVAC, and you have a building system that punches well above its weight.
If you’re considering a pole barn for your property and want to talk through your project with a team that builds post-frame structures every day, we’d love to help. Steel Structures America serves Idaho, Washington, Oregon, Colorado, Montana, and surrounding areas.
Ready to get started? Check out our full Pole Barn guide for an overview of sizes, costs, and what to expect, or reach out to our team to start planning your build.