
Lean-To Post Footing: What Your Contractor Needs to Get It Right
Lean-to post footing design is one of those details that does not get much attention until something goes wrong. A lean-to looks like a simpler structure than a full building, but the footings holding up those perimeter posts carry real loads and need to be engineered for the site, the span, and the local frost depth. Get them right and your lean-to stands solid for decades. Get them wrong and you are looking at settling, heaving, or posts that eventually lean in ways they were never supposed to.
Whether you are adding a lean-to to an existing pole barn, building a freestanding covered storage area, or framing out a porch addition, this guide breaks down everything that goes into a properly designed lean-to footing: depth, diameter, post spacing, soil conditions, and how a qualified contractor approaches the whole thing.
Why Lean-To Footings Are Worth Understanding
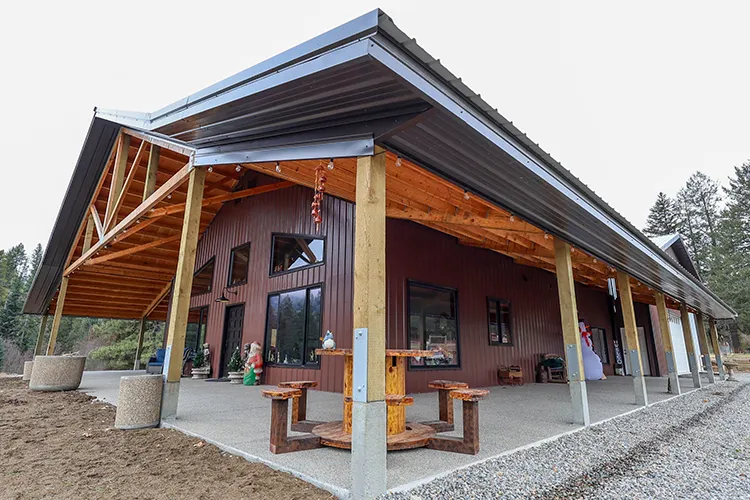
A lot of buyers assume lean-to footings are pretty much the same as the footings on the main building. In most cases, they are similar in concept but there are important differences that affect how they are designed and installed.
Lean-to posts typically carry roof loads from only one side. They also often sit at the perimeter of a structure, which means drainage patterns, soil compaction, and frost exposure can behave differently than in the building’s interior. On an attached lean-to, the ledger connection to the main building carries some of the load, which changes the calculation for the outboard posts. A freestanding lean-to distributes loads differently again.
The point is that lean-to footing design is not one-size-fits-all. Your contractor should be sizing and spacing posts based on your specific building plan, not just copying the main building’s footing spec. If you want to understand the bigger picture of lean-to sizing and cost, our lean-to size and cost guide is a good place to start.
What Is a Lean-To Post Footing?
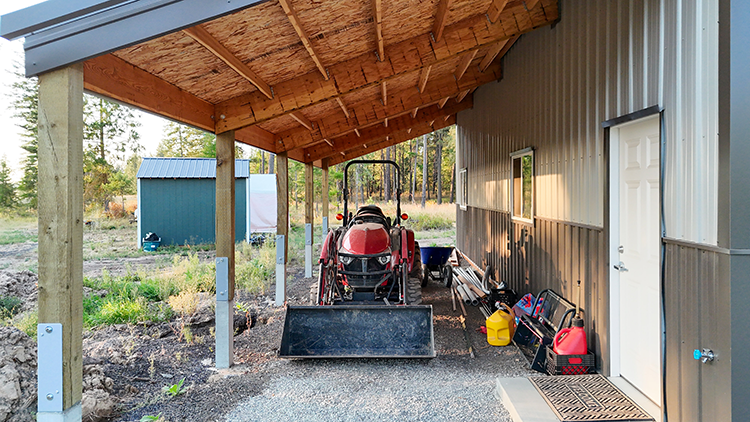
A footing is the concrete base that supports a post and transfers the load from the structure down into stable ground. For a lean-to, this typically means a cylindrical hole drilled or dug into the ground, filled with concrete, with the post either embedded directly in the concrete or anchored on top of it.
The footing does two jobs. First, it spreads the load from the post over a wide enough area of soil that the ground does not compress or fail under the weight. Second, it extends deep enough below the frost line that freeze-thaw cycles in the soil do not push the post up and out of position over time. Both of these factors, load bearing and frost depth, drive the sizing decisions your contractor will make.
Lean-To Post Footing Depth: The Frost Line Is the Starting Point
The single most important number for any post footing is the local frost depth, which is the depth to which the ground freezes in winter. Footings that do not extend below the frost line are vulnerable to frost heave, where freezing soil expands and literally pushes posts upward, throwing your structure out of level and potentially damaging connections and roofing.
Frost depth varies significantly by region. Here are typical frost depths across SSA’s primary service area:
| State / Region | Typical Frost Depth | Notes |
| Idaho (north) | 24 to 36 inches | Coeur d’Alene, Post Falls area |
| Idaho (south) | 18 to 30 inches | Boise area, milder winters |
| Eastern Washington | 24 to 36 inches | Spokane, Yakima corridors |
| Oregon | 12 to 24 inches | Varies widely; eastern OR is colder |
| Colorado | 30 to 48 inches | Higher elevations push the deeper end |
| Montana | 36 to 60 inches | One of the deepest frost zones in the region |
Your contractor should know the local frost depth for your county or pull the current code requirement from the jurisdiction. A good rule of thumb is that footings should extend at least 12 inches below the frost depth, not just to the frost line itself, to provide an adequate safety margin.
In Montana and high-elevation Colorado, this means some lean-to footings go 5 feet or deeper. That is not unusual, and it is exactly why local knowledge matters when hiring a contractor.
Footing Diameter: Matching the Footing Size to the Load
Footing diameter is determined by how much load the footing needs to carry and how capable the soil is of bearing that load. These two things together, load and soil bearing capacity, give your contractor the minimum footing diameter.
How Load Affects Footing Diameter
For a lean-to, the loads that land on each footing come from the tributary area of roof that each post supports. A wider lean-to with heavy snow loads needs larger footings than a narrow porch-style lean-to with a light metal roof. In SSA’s service area, the combination of significant wind loads (especially in eastern Washington, Montana, and Colorado) and heavy snow loads can push footing requirements larger than buyers expect.
Typical residential and agricultural lean-to footings in this region range from 10 inches to 18 inches in diameter. Commercial or agricultural lean-tos on wide spans or with high snow load requirements may go larger.
How Soil Conditions Affect Footing Diameter
Soil bearing capacity is measured in pounds per square foot and tells you how much load the ground can support without compressing or failing. Common reference values used in construction:
| Soil Type | Approximate Bearing Capacity |
| Bedrock or dense gravel | Very high (4,000+ PSF) |
| Compact sand or gravel | High (2,000 to 4,000 PSF) |
| Sandy or gravelly soil (loose) | Moderate (1,500 to 2,000 PSF) |
| Clay or silty soil | Lower (1,000 to 1,500 PSF) |
| Soft clay or organic soil | Poor (under 1,000 PSF) |
Weaker soils require larger diameter footings to spread the load over more surface area. If your site has clay-heavy or soft soil, your contractor may also recommend footings with belled bottoms (wider at the base than the shaft) to increase the bearing area without drilling an enormous hole the entire depth.
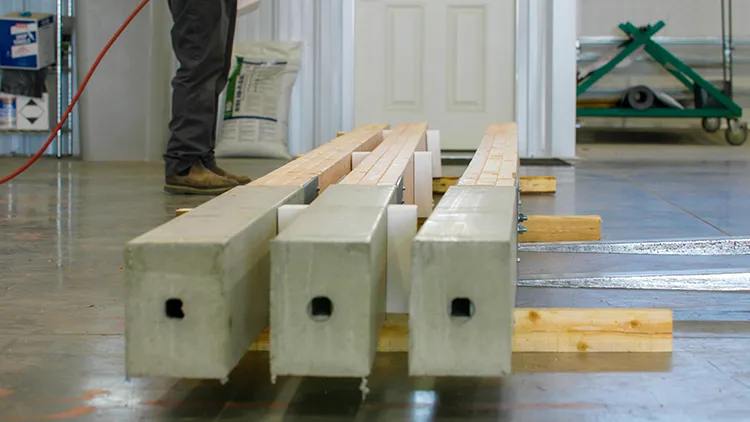
This is also a place where Perma-Column post bases can make a real difference. By keeping the wood post above grade and anchoring it to a properly designed concrete column, you eliminate the wood-to-soil rot problem that shortens the life of embedded posts. If you are curious how that system works, our Perma-Column pole barn guide covers it in detail.
Lean-To Post Spacing: How Far Apart Should Posts Be?
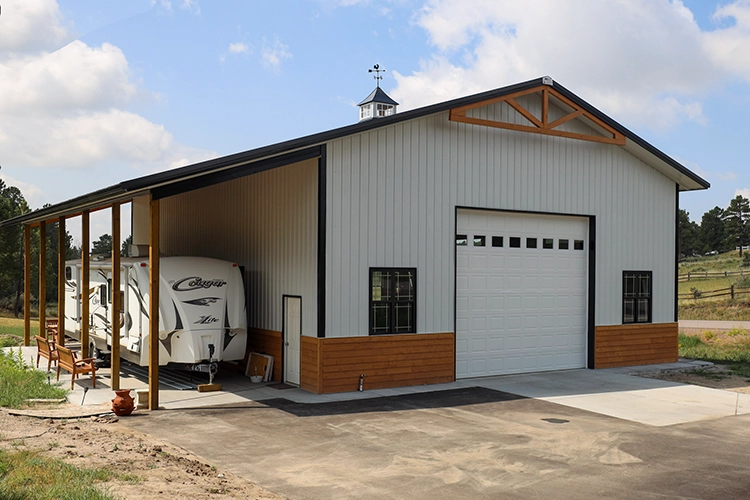
Lean-to post spacing is driven by the structural design of the roof framing system. The posts support rafters or purlins that span from the main building’s ledger board (on an attached lean-to) or a ridge beam to the outside wall. How far apart those rafters can span without sagging determines how far apart the posts can be placed.
Typical Lean-To Post Spacing Ranges
For most residential and agricultural lean-tos built with post-frame construction, post spacing of 8 to 12 feet on center is the most common range. Here is how different scenarios tend to shake out:
| Application | Typical Post Spacing | Notes |
| Residential porch lean-to | 8 to 10 feet on center | Lighter loads, shallower span |
| Agricultural storage lean-to | 10 to 12 feet on center | Equipment access, wide spans common |
| Commercial lean-to or shop addition | 10 to 14 feet on center | Depends heavily on engineered span tables |
| High snow load region | 8 to 10 feet on center (tighter) | Montana, CO high elevation lean-tos |
These are general guidelines, not specifications. Your contractor will size the actual spacing based on the engineered load calculations for your building’s location, the lean-to width, the roof pitch, and the expected snow and wind loads. Do not let a contractor skip this step. Properly engineered post spacing is the difference between a lean-to that performs as designed and one that causes warranty issues.
Post Spacing and Footing Size Are Connected
It is worth noting that post spacing and footing size are related. If posts are spaced farther apart, each post carries a larger tributary area of roof load, which means each footing needs to be larger or the post embedment needs to be deeper. Your contractor should be calculating this as a system, not making isolated decisions about spacing and footing size separately.
In-Ground Posts vs. Surface-Mounted Posts for Lean-Tos
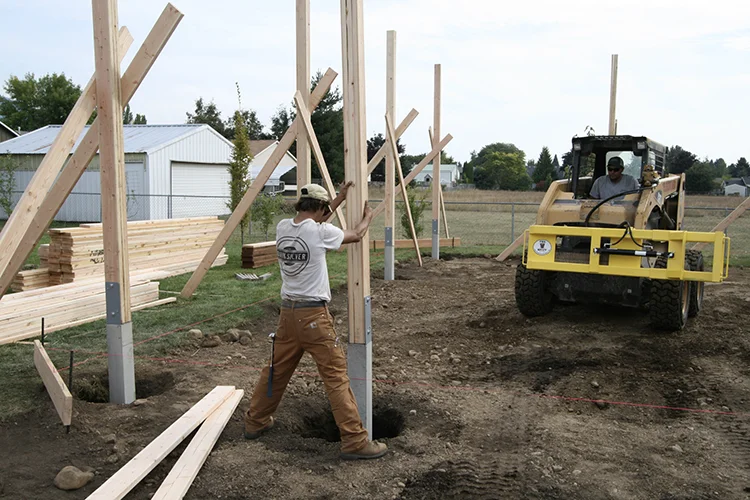
When it comes to how the post connects to the footing, you generally have two options: embed the post directly in the concrete footing (in-ground post) or anchor the post to the top of a concrete footing using a post base connector (surface-mounted post). Both are legitimate approaches with different trade-offs. Our guide on pole barn posts in ground vs. concrete goes deep on the comparison if you want the full picture.
Embedded In-Ground Posts
Embedding the post directly in the concrete provides excellent resistance to lateral forces, which is important for lean-tos in high-wind areas. The post is surrounded by concrete over a significant depth, giving it the ability to resist racking and lateral loading that a surface-mounted connector may not provide as effectively.
The trade-off is that wood posts embedded in concrete and soil are vulnerable to rot at the soil line, even with pressure treatment. In wet climates or poorly drained sites, this can become a long-term maintenance issue.
Surface-Mounted Post Bases
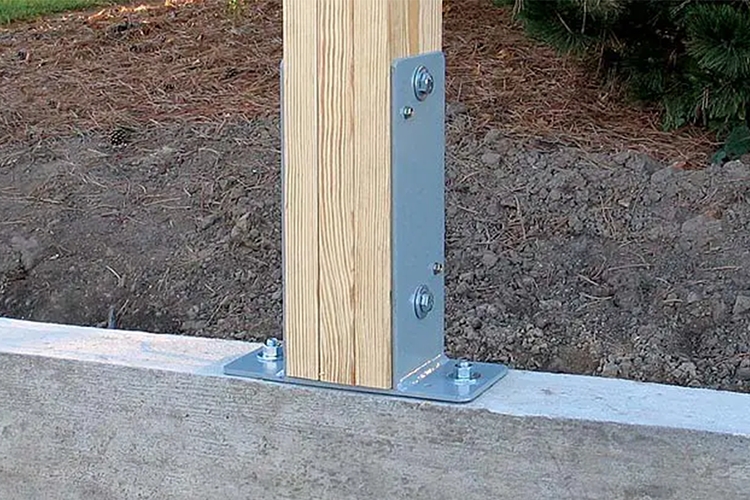
Surface-mounted post base systems anchor the post to the top of a concrete pier with a metal connector. This keeps the post above grade and above moisture contact, which is better for longevity. The concrete pier is poured separately and the post base hardware is anchored into it.
The limitation is that surface-mounted bases rely on the connector hardware for lateral resistance, which may not be sufficient for very high wind or seismic load situations without additional engineering. Your contractor should evaluate which approach fits the site conditions and local code requirements.
Perma-Column as a Lean-To Footing Solution
For lean-tos where long-term durability is a priority, a Perma-Column precast concrete post base is worth asking about. It provides the lateral resistance of an embedded system while keeping the wood post above the moisture zone, combining the best of both approaches. SSA uses Perma-Column on its post-frame builds, and it is particularly well-suited for lean-to posts at perimeter locations where drainage exposure can accelerate wood degradation.
What the Footing Installation Process Looks Like
Understanding the process helps you know what to expect and what to ask your contractor about. Here is a general sequence for lean-to post footing installation:
- Hole drilling or digging: Post holes are typically drilled with a tractor-mounted or skid-steer-mounted auger. The diameter and depth are set according to the engineered plan. Hand digging is used in areas where equipment access is limited.
- Dry setting or form tubes: Some contractors use form tubes (sonotubes) as a guide for the concrete pour. Others drill clean holes and pour directly against the soil.
- Gravel base (where required): In some designs, a layer of compacted gravel is placed at the bottom of the hole to improve drainage and create a stable bearing surface.
- Concrete placement: Concrete is poured into the hole. For embedded posts, the post goes in while the concrete is wet and is held plumb until the concrete sets. For surface-mounted systems, the concrete is poured and the anchor hardware is set while the concrete is wet.
- Backfill and compaction: Once the concrete has cured, the hole is backfilled with compacted material to restore the surrounding grade and support the base of the post.
Concrete cure time matters here. A contractor should not load the framing onto fresh footings before the concrete has developed adequate strength, which typically means waiting at least 24 to 48 hours for light loading and longer for full structural loading. Rushing this step is a red flag.
When Is Engineering Required for Lean-To Footings?
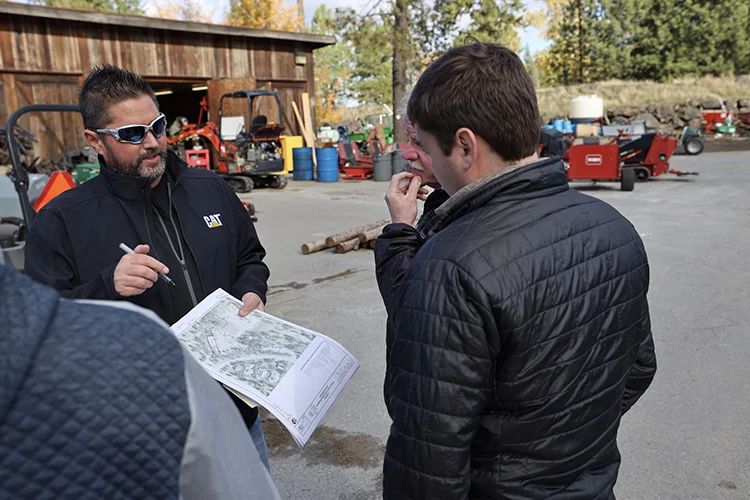
Building permits for lean-to additions typically require engineered plans in most jurisdictions. This means a licensed engineer has reviewed the footing design, post spacing, connection details, and load assumptions and stamped the drawings. If your contractor is proposing to build your lean-to without pulling a permit or providing engineered drawings, that is a serious concern. Not only does it put you at risk of code violations, it also means nobody has formally checked that the footing design is adequate. Our guide to adding a lean-to to a pole barn covers the permit process in more detail.
Even if your jurisdiction does not technically require a permit for a smaller lean-to, having an engineered design gives you documented proof that the structure was built to a legitimate standard, which matters for insurance and property resale.
Common Lean-To Footing Mistakes to Know About
A good contractor avoids these. Knowing what they are helps you ask the right questions before work starts.
- Footing too shallow: The most common mistake in cold climates. Footings above the frost line will heave seasonally, causing misalignment and structural stress.
- Undersized footing diameter: A footing that is too narrow concentrates load on too small an area of soil, leading to settlement over time.
- Post not plumb at installation: If a post is not perfectly vertical when the concrete sets, there is no easy fix. The problem compounds as the structure is framed.
- Inadequate concrete mix or cure time: Weak concrete or concrete loaded too early does not develop the strength the design assumes.
- Ignoring soil conditions: Using a standard footing spec without accounting for poor or variable soil on the site leads to differential settling, where different footings settle at different rates and throw the structure out of level.
- Skipping the gravel base: In wet or clay-heavy soils, skipping the drainage layer at the bottom of the hole sets up the footing for moisture problems and frost instability.
Questions to Ask Your Contractor Before Work Starts
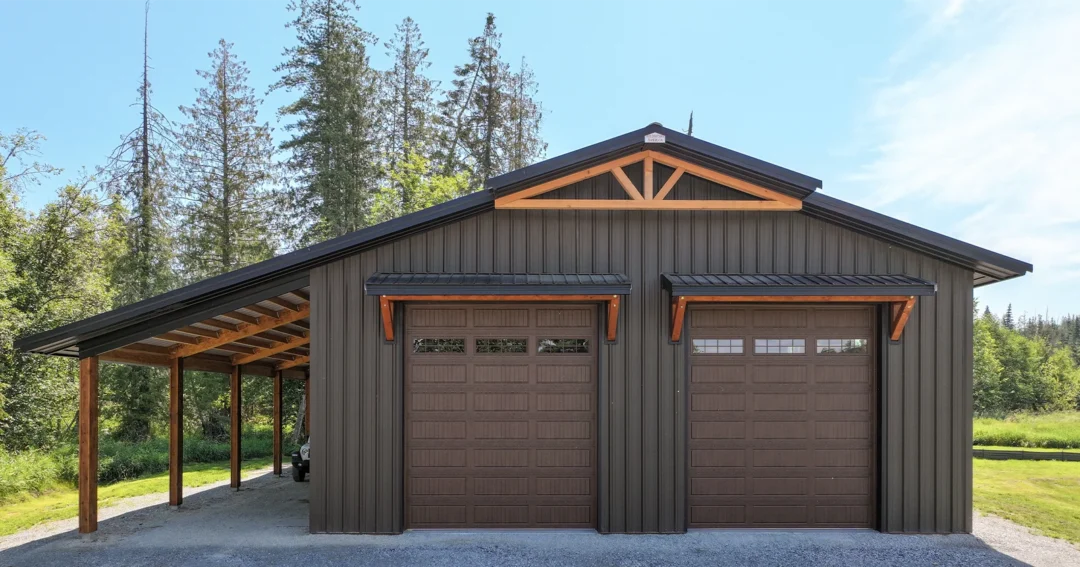
When you are planning a lean-to, these are the footing-specific questions worth asking:
- What is the frost depth for my county and how deep will the footings go?
- How are you sizing the footing diameter and what soil bearing capacity are you designing for?
- Will the posts be embedded or surface-mounted? What is your reasoning for the approach on my site?
- Are you pulling a permit and will the footings be inspected before concrete is poured?
- Will the design include engineered stamped drawings?
- What concrete mix and cure time are you specifying?
A contractor who gives clear, specific answers to these questions is one who takes the foundation work seriously. Vague answers or pushback on permits is a red flag worth paying attention to.
How Lean-To Post Footings Fit Into the Bigger Picture
Footings are one part of a larger lean-to design. The footing connects to the post, the post connects to the roof framing, and all of it connects to the main building structure if the lean-to is attached. If any link in that chain is undersized or incorrectly detailed, the whole structure can develop problems. For a broader look at lean-to buildings generally, including types, sizes, and common applications, our lean-to buildings overview is a solid starting point. And if you want to understand post-frame foundations at a deeper level beyond just lean-tos, our pole barn foundations guide covers the full range of footing systems and foundation options used in post-frame construction.
Ready to Plan Your Lean-To?
Getting the footings right starts with working with a contractor who takes the engineering seriously. At Steel Structures America, every lean-to we build is designed with proper footing depth, post spacing, and load calculations for the specific site and location, not just a generic spec applied to every project.
If you are planning a lean-to addition or a new lean-to building in Idaho, Washington, Oregon, Colorado, or Montana, we would be glad to walk through the design with you. Reach out to the SSA team to get started.