
How to Plan a Dream Shop Building: Layout, Size, and Features
Planning a shop building the right way from the start saves you time, money, and the frustration of realizing six months in that you built it wrong. Whether you are putting up a 30×40 pole barn shop for weekend projects or a 60×100 steel building for a growing contracting business, the planning process is where the real work happens. Get this right and the build itself goes smoothly. Get it wrong and you spend years working around mistakes that could have been avoided.
This guide walks you through every major planning decision: how to figure out the right size, how to think about layout, which features matter most, and how to avoid the most common planning mistakes we see from buyers across Idaho, Washington, Oregon, Colorado, and Montana.
This guide focuses on layout of a single story shop. We also have a complete guide on two-story shops and other post frame buildings here.
Start With What the Shop Needs to Do
Before you think about size or layout, write down everything the shop needs to accomplish. Be specific. This list becomes the foundation for every other decision.
Ask yourself:
- What vehicles will go inside, and how many? Think about current vehicles and anything you might acquire in the next five to ten years.
- What equipment or machinery needs to be stored or operated inside?
- Will you be doing mechanical work, fabrication, woodworking, or other active projects inside the shop?
- Do you need a dedicated office, bathroom, or break area?
- Will clients or customers ever come to the shop?
- Is there any chance you will add living quarters now or in the future?
- What are your electrical requirements? Think through every tool, machine, welder, and HVAC unit that will run at the same time.
Most people who undersize their shop do so because they planned around current needs without leaving room for growth. Build a little bigger than you think you need today.
How to Choose the Right Shop Building Size
Size is one of the most consequential decisions in the whole project. Too small and you are cramped within a year. Too large and you are paying for square footage that does not serve you. The right size comes from working through your list of needs and then mapping them to dimensions.
Check out our complete pole barn square footage guide for more detail.
Here is a practical framework:
Account for Every Vehicle and Piece of Equipment
Start with footprints. A standard pickup truck is roughly 7 feet wide and 20 feet long. An enclosed trailer adds another 8 by 25 feet minimum. A skid steer might be 6 by 10 feet. A boat on a trailer could run 8 by 30 feet. Add up all the footprints of what you need to park or store and that gives you your minimum floor area before you account for aisles, workbench space, or anything else.
Add Working Space
You cannot work efficiently if you are wedged between machines or have to move a vehicle every time you want to get to a workbench. A good rule of thumb is to take your equipment footprint total and add 30 to 50 percent for circulation and working room. If your vehicles and equipment need 1,000 square feet to park, plan for 1,300 to 1,500 square feet of total floor area at minimum.
Plan Dedicated Work Zones Separately
If you want a dedicated woodworking area, a welding station, a mechanic’s bay, or a parts room, those need their own square footage on top of the vehicle and equipment storage area. A serious woodworking setup with a table saw, jointer, planer, and assembly table can easily eat 400 square feet by itself. A mechanic’s bay with a lift needs around 400 square feet minimum.
Common Shop Sizes and What Fits
| Size | Square Feet | Fits Well |
| 30×40 | 1,200 sq ft | 2 vehicles, hobby workspace, basic tool storage, riding mower |
| 40×60 | 2,400 sq ft | 3-4 vehicles, dedicated workspace, small equipment, contractor essentials |
| 50×80 | 4,000 sq ft | Full contractor operation, heavy equipment, multiple work zones, office |
| 60×100 | 6,000 sq ft | Commercial shop, large equipment fleet, crew workspace, significant storage |
| 80×120+ | 9,600+ sq ft | Agricultural operations, commercial fabrication, multiple business uses |
If you are still unsure what size fits your needs, our parent guide on shop buildings covers sizing across common buyer types in more detail.
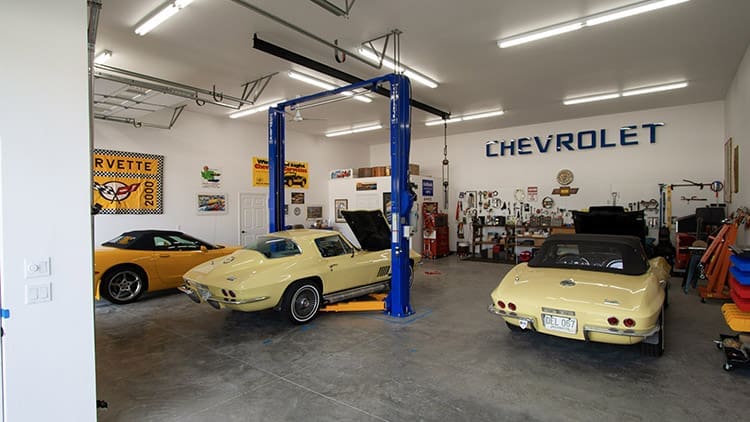
Shop Building Layout: How to Think About Interior Design
Layout is where a shop goes from a box to a tool. A well-laid-out shop reduces wasted steps, makes tasks easier, and prevents the frustration of constantly moving things around to get to what you need.
The Drive-Through Layout
A drive-through layout has overhead doors on opposite ends of the building, so vehicles can enter one side and exit the other without backing in or out. This is ideal for truck-and-trailer operations, equipment dealers, or any setup where you frequently move large vehicles in and out. It requires a building that is long enough to accommodate the full length of your longest vehicle plus some working room on each end.
The Drive-In Layout
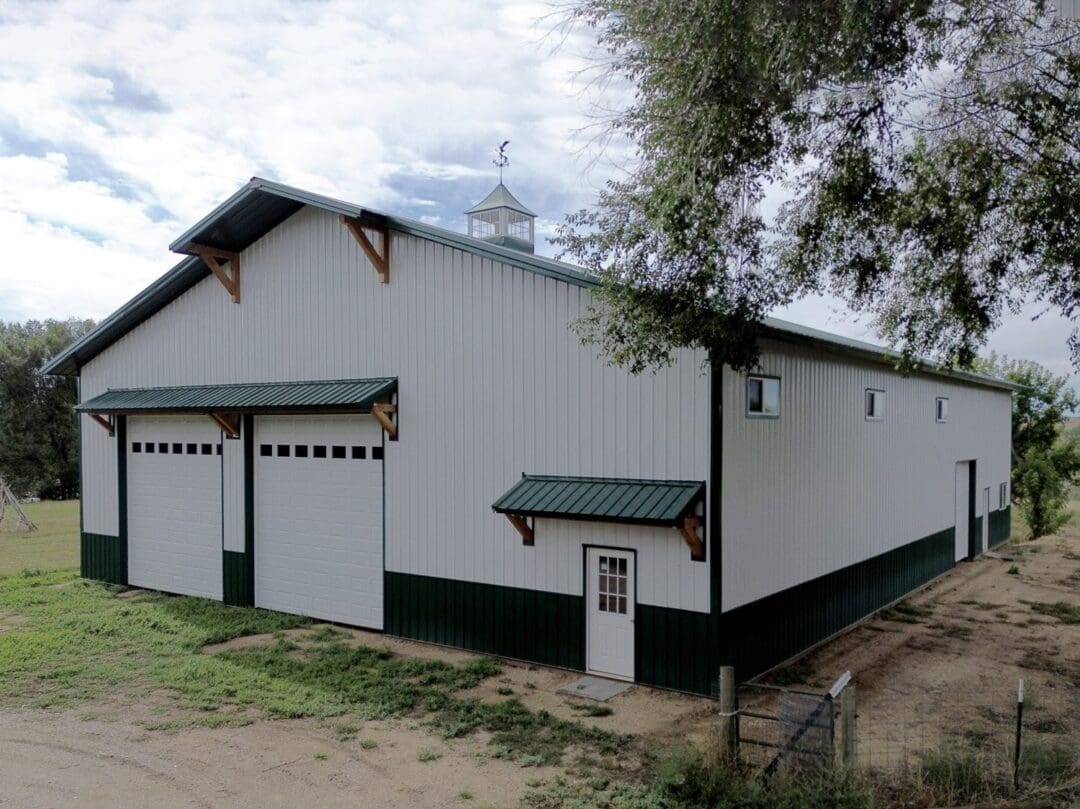
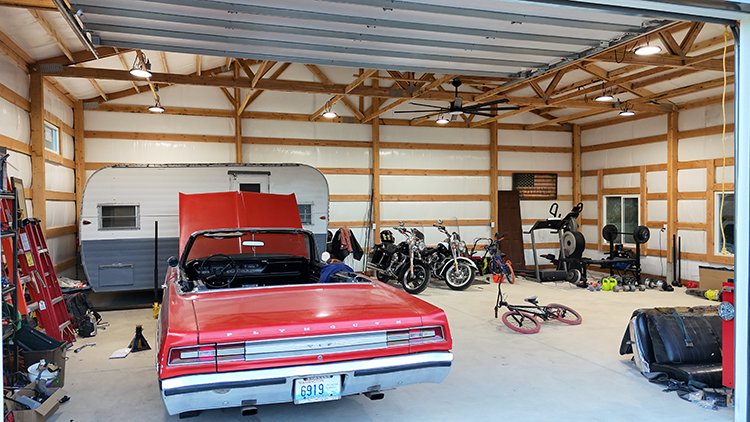
A drive-in layout has overhead doors on one end only. Vehicles park in and back out. This is the most common layout for personal and hobby shops where vehicles go in, stay for a while, and come back out when needed. It is simpler and works well for most residential and small business uses.
The L-Shape or Combination Layout
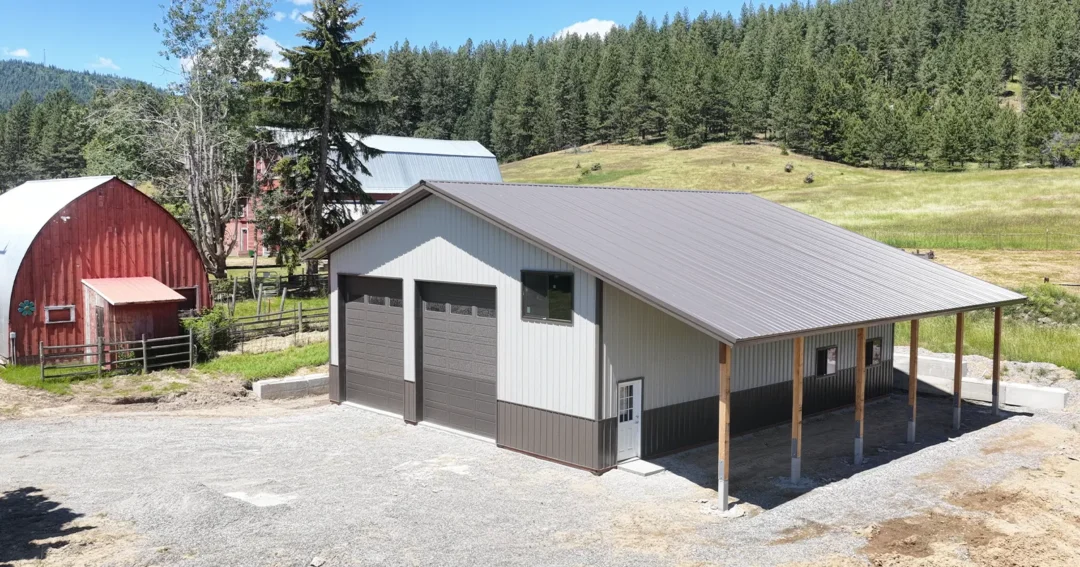
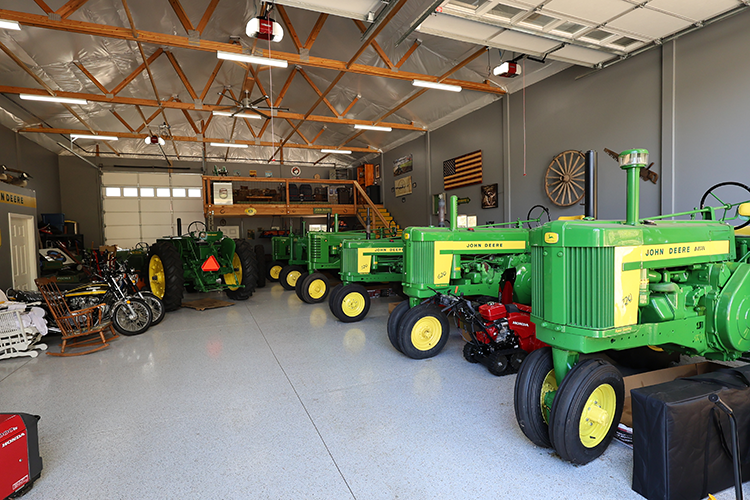
Larger shops sometimes use an L-shaped footprint or a main building with a lean-to addition to separate functions. For example, a 40×60 main shop with a 16×60 lean-to on one side gives you covered outdoor storage or a separate sheltered work area without expanding the main interior. This is a cost-effective way to add functional square footage.
Zoning Your Interior
Think of your interior as zones. Common zones for a contractor or multi-use shop include:
- Vehicle parking and storage zone along the main door wall
- Workbench and tool storage zone along a side wall
- Open center aisle for moving equipment and working around vehicles
- Office, bathroom, and utility zone in a back corner
- Parts, inventory, or mechanical storage in a secondary zone
The specific zones depend on your use case, but drawing them out before you finalize your building dimensions often reveals that you need more length, more width, or both.
Plan Your Door Positions Early
Overhead door positions drive your layout more than almost anything else. Where the doors go determines how vehicles enter and park, which walls are available for workbenches or shelving, and how traffic flows through the space. Get your door positions locked in during the planning phase, not after framing begins.
Key Features to Lock In Before You Build
Beyond size and layout, several specific features have a major impact on how well the shop functions. These are worth thinking through carefully before you finalize your building plan.
Overhead Door Height and Width
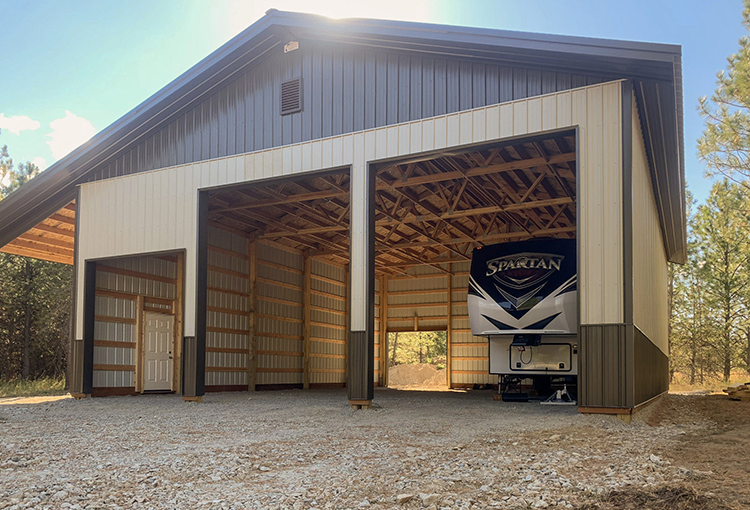
This is one of the most common planning mistakes we see. Buyers choose standard 9-foot or 10-foot overhead doors and then regret it when they try to fit a lifted truck, an RV, or a combine inside. Think through the tallest and widest thing that will ever need to enter the building, add a couple of feet of clearance, and set your door spec from there. Common upgrades worth considering:
- 14-foot tall doors for RVs, large enclosed trailers, or grain carts
- 16-foot or taller doors for combines, telescoping loaders, or hay equipment
- 12-foot or 14-foot wide doors for large enclosed trailers or wide equipment
- Multiple overhead doors to allow drive-through layouts or separate access zones
Eave Height
Eave height is the height from the finished floor to the bottom of the roof line at the sidewall. This affects how usable your interior is, especially for storing tall equipment, installing a vehicle lift, or adding a loft or mezzanine. A 14-foot eave is a solid minimum for most shops. Agricultural buildings frequently use 16 to 20 feet to accommodate equipment. If you are even considering a lift or a loft, plan your eave height now.
Electrical Service
Most residential buildings have 100 or 200 amp service. Most working shops need at least 200 amps, and many contractors, welders, and serious hobbyists run 400 amps. Before you commit to a panel size, list every piece of electrical equipment that might run simultaneously: welder, air compressor, vehicle lift, dust collector, HVAC, lighting, and anything else. Then work with an electrician to size the panel correctly. Running larger service during initial construction is a small cost compared to upgrading later.
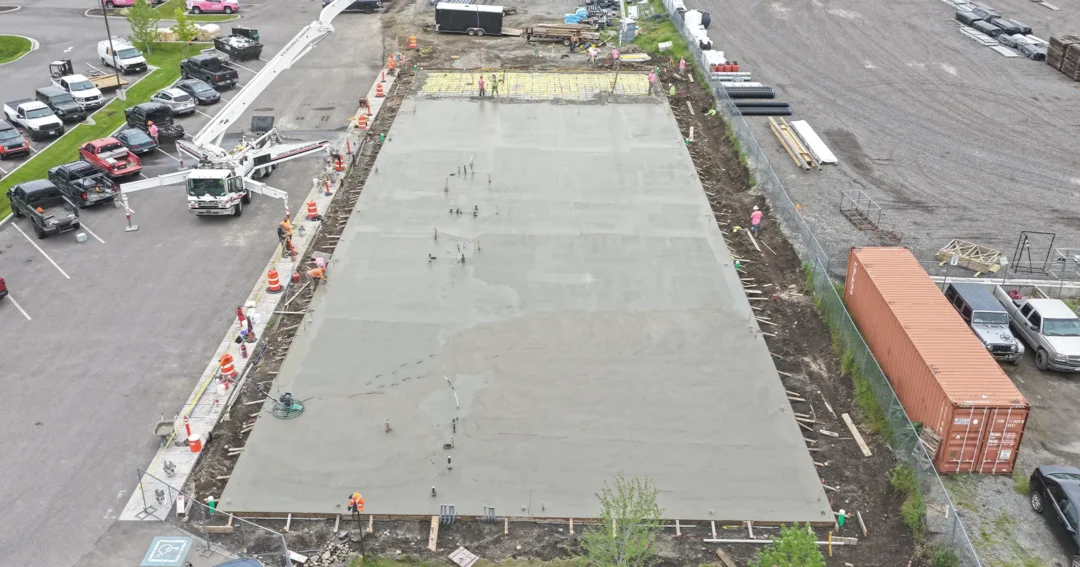
Concrete Floor Specifications
A shop floor takes a beating. Vehicles, equipment, chemical spills, heavy impacts, and decades of use are all going to happen on that slab. Getting the specifications right from the start matters. Consider:
- Thickness: 4 inches is a minimum for most personal shops; 6 inches is better for contractor and commercial use where heavy equipment operates
- Reinforcement: Rebar grids or fiber reinforcement improve crack resistance significantly
- Vapor barrier: A poly vapor barrier under the slab controls moisture from below
- Saw cuts: Control joints cut into the slab guide cracking to predictable locations
- Apron: A concrete apron in front of overhead doors creates a clean, stable transition surface
Insulation and Climate Control
A shop you can work in year-round is worth considerably more than one you avoid in extreme weather. The right insulation and HVAC setup depends on your climate, your use case, and your budget. Spray foam insulation provides the best thermal performance and also controls condensation, which is a real issue in metal and post-frame buildings. Fiberglass batt insulation costs less but requires a proper vapor barrier to manage moisture. For heating and cooling, mini-split systems work well for personal and hobby shops. Larger commercial shops often use forced-air heating, radiant floor heat, or unit heaters depending on the application.
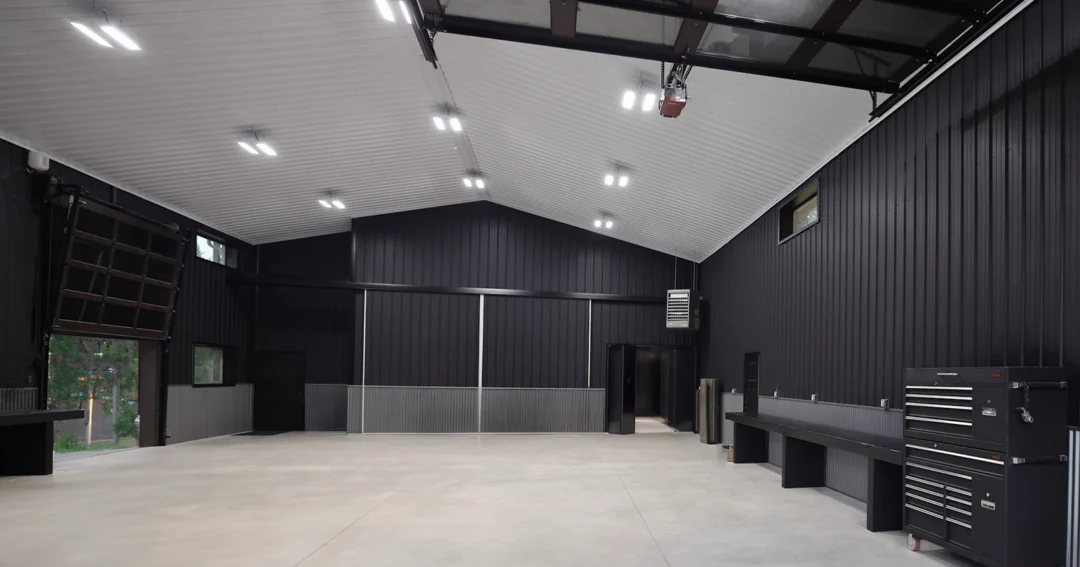
Lighting

Good lighting is cheap during the build and expensive to retrofit. Plan for generous overhead lighting on a circuit that is separate from your major equipment. LED shop lights are energy-efficient, produce minimal heat, and provide good color rendering for detailed work. If you plan to do any detailed mechanical, fabrication, or finishing work, add task lighting zones at the workbench and project areas. Wherever possible, also add windows to bring in natural light.
Plumbing and Bathroom
Running plumbing lines during construction is straightforward. Adding plumbing after the slab is poured is expensive and disruptive. If you think you might ever want a bathroom, utility sink, floor drain, or water supply in the shop, plan for it now even if you do not install all the fixtures immediately. At minimum, sleeve conduit and rough plumbing through the slab during the pour so the option stays open.
Common Shop Building Planning Mistakes
After working with buyers across the Pacific Northwest and Mountain West for years, we see the same planning mistakes come up repeatedly. Here is how to avoid them.
- Undersizing the overhead doors: The most common regret we hear. If you think you want a 10-foot door, strongly consider going to 12 or 14 feet.
- Forgetting the concrete apron: A gravel or bare-dirt transition zone in front of your overhead doors creates mud and erosion problems. Plan for a concrete apron.
- Undersizing the electrical panel: Plan for what you might do in the shop someday, not just what you do today. Upgrading a panel later is a significant project.
- Ignoring drainage: Your site needs to drain water away from the building. Slope, gutters, and downspout routing matter and are easier to handle during planning than after.
- Not accounting for future expansion: If you think you might add a lean-to or expand the building someday, orient the building now so an addition makes sense later.
- Skipping the zoning review: Setback requirements, permitted uses, and building codes vary significantly by county and jurisdiction. Check with your local planning department before finalizing your site plan.
Building Your Shop: What Comes Next

Once you have worked through the planning framework above, you are ready to start having real conversations with builders and getting accurate quotes. When you reach out to Steel Structures America, we will walk through your project with you, ask the right questions to fill in any gaps, and put together a quote that reflects your actual specs.
We build custom pole barn shops and metal building workshops across Idaho, Washington, Oregon, Colorado, and Montana. If you have not already, our full guide to shop buildings covers the broader overview of building types, sizes, and costs if you need more context before diving into planning details.
Frequently Asked Questions About Planning a Shop Building
What is the first step in planning a shop building?
Start with your use list. Write down everything the building needs to do, every vehicle, every piece of equipment, every function. Get specific. That list drives every decision that follows, from size to layout to electrical service.
How long does it take to plan and build a shop?
The planning phase, from initial conversations to finalized specs, typically takes two to four weeks depending on how quickly you can make decisions. Permitting varies by county and can take anywhere from a week to several months. The physical build for a typical residential shop runs four to eight weeks once materials are on site.
Should I build bigger than I think I need?
In most cases, yes. The most common regret we hear from shop owners is that they did not build large enough. Adding square footage during initial construction is always cheaper than expanding later. A good rule of thumb: add 20 percent to whatever size you think you need.
What is the best layout for a shop building?
The best layout depends entirely on use. For vehicle and equipment storage with active work, a drive-in layout with overhead doors on one end and workbench zones along the side walls works well for most personal and hobby shops. For contractor and fleet operations with frequent vehicle movement, a drive-through layout with doors on both ends is often more efficient.
Do I need a floor drain in my shop?
If you plan to wash vehicles or equipment inside the shop, do any mechanical or fluid work, or have a bathroom, a floor drain adds significant convenience. Plan for it during construction because adding a drain after the slab is poured requires cutting and patching the concrete.