
Pole Barn Foundations: Footings, Floors, and Foundation Options Explained
Pole barn foundation decisions are some of the most important choices you’ll make before your building goes up, and they’re also some of the most misunderstood. Get this part right and your structure stands strong for decades. Get it wrong and you’ll be dealing with settling, rot, and expensive repairs before you know it.
This guide covers every major foundation decision you’ll face: how posts are set, what your floor options are, how Perma-Column systems compare to traditional in-ground posts, and what site prep looks like before construction starts. Whether you’re planning a shop, a barn, a garage, or a full barndominium, this is where it all starts.
What Makes a Pole Barn Foundation Different
Traditional stick-built homes sit on a continuous concrete foundation wall or perimeter footing that bears the building’s load around its entire perimeter. Pole barns work differently. In a post-frame building, the structural load is carried by individual vertical posts spaced at regular intervals, typically 8 to 12 feet apart. Those posts transfer the load directly into the ground, so the foundation is really each individual post and the soil or concrete around it.
This is what makes pole barns so cost-effective and fast to build. You’re not pouring a full perimeter foundation before construction can start. But it also means the connection between each post and the ground is critical. How that connection is made and how well it resists moisture, frost heave, and rot determines how long your building holds up.
The Three Core Foundation Questions
Before breaking ground, every pole barn owner or builder needs to answer three basic questions:
- How will the posts be set? (In-ground, on-concrete, or with a precast system like Perma-Column)
- What will the floor be? (Gravel, concrete, or a combination)
- Is the site properly prepared for long-term drainage and stability?
Each of these decisions affects cost, longevity, and what the building can ultimately be used for. We’ll walk through each one.
If you’d prefer to look at the pole barn construction process as a whole, click here.
Pole Barn Post Setting Options
How your posts are set is the single most debated foundation topic in post-frame construction. There are three main methods used today, each with real trade-offs.
1. In-Ground Posts
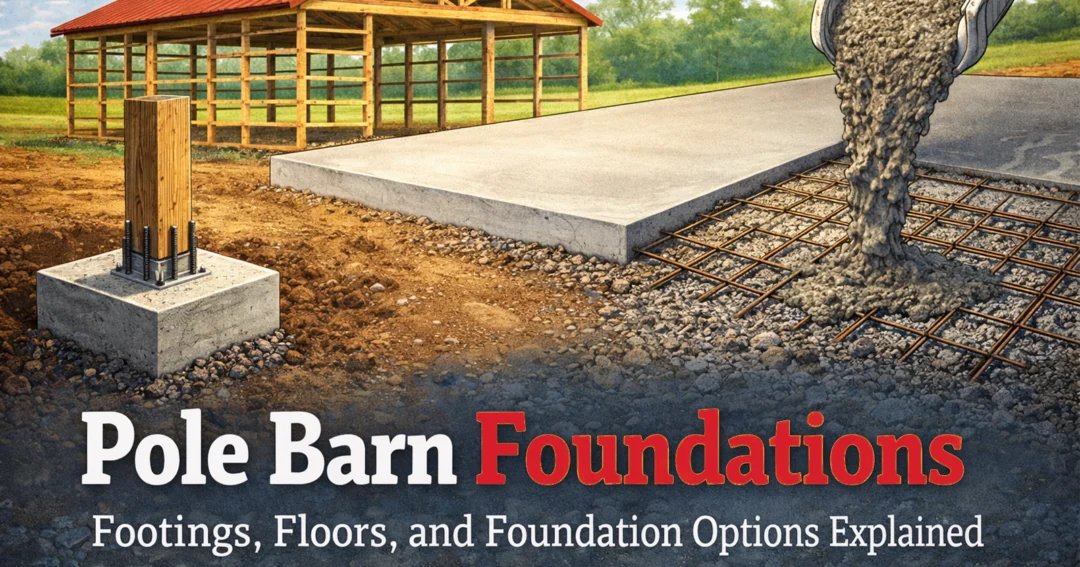
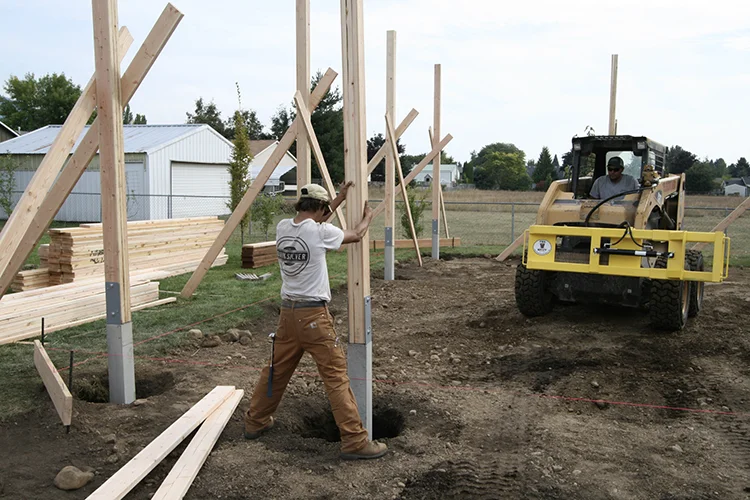
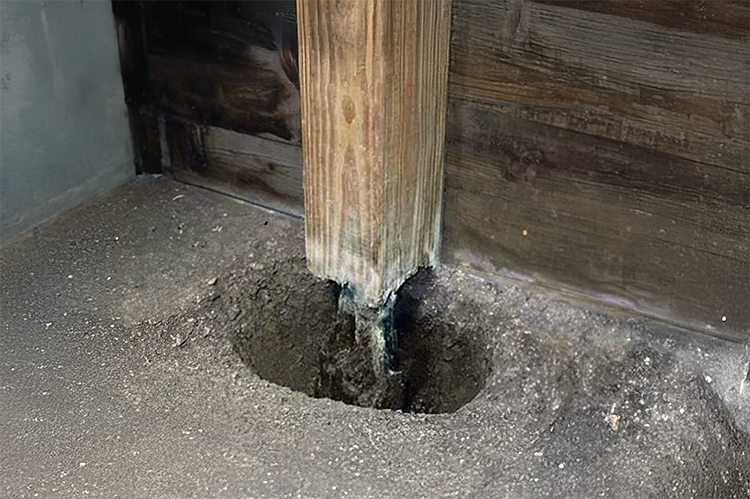
The traditional and most common method. Treated wood posts are set directly into the ground, typically 4 to 6 feet deep depending on the frost line in your region and the height of the building. The hole is dug or augered, the post is set, and concrete is poured around the base to lock it in place and shed water away from the post.
How it works: A hole is dug below the local frost depth. The post is plumbed and braced. Concrete is poured around the base, often in a bell-shape or flared footing at the bottom to resist uplift from wind loads.
The main concern: Even pressure-treated lumber eventually rots when it’s in direct contact with soil and moisture. How fast that happens depends on soil type, drainage, local climate, and how well the post was treated. In wet or clay-heavy soils, post rot can become an issue in as little as 15 to 20 years. In well-drained soils, treated posts can last 40 years or more.
Cost: In-ground posts are the lowest upfront cost option and are the standard in most production pole barn builds.
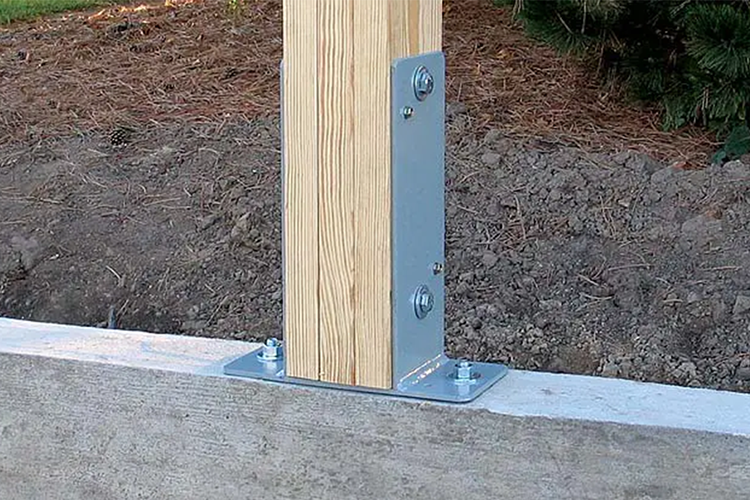
2. Posts Set on Concrete
Some builders set posts on a concrete footing or pad rather than in the ground. The post rests on a notched or bracket-mounted concrete base, keeping the wood completely out of soil contact.
The advantage: Eliminating soil contact dramatically extends the life of the post. Wood above grade that stays dry will last much longer than wood buried in damp soil.
The challenge: Uplift resistance. A post that’s buried 5 feet in concrete-reinforced ground resists wind uplift very well. A post that’s simply resting on a pad or pinned into a bracket depends entirely on the anchor design and footing weight to resist being lifted by wind loads. This method requires careful engineering, particularly in high-wind regions.
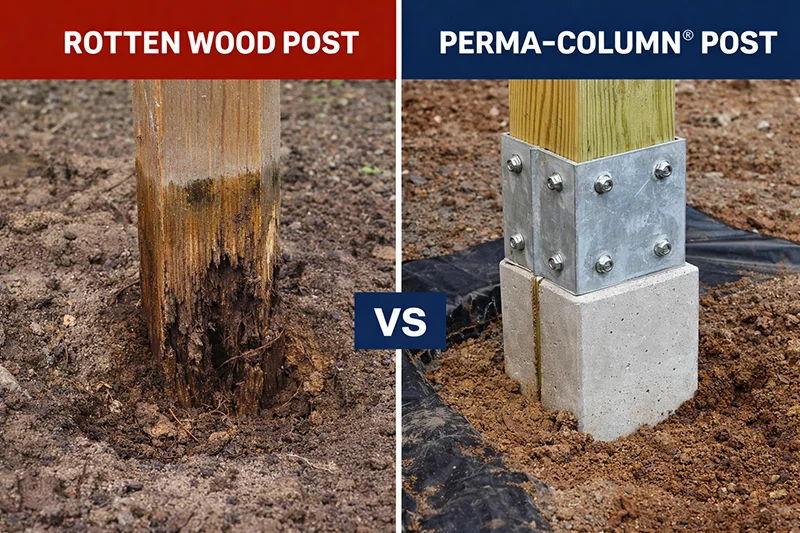
3. Perma-Column Systems
Perma-Column is a precast concrete column system designed specifically for post-frame construction. It’s one of the most significant advancements in pole barn foundation technology available today, and it’s a system we install at Steel Structures America.
A Perma-Column unit is a precast concrete sleeve that’s set in the ground in place of the buried portion of the wood post. The concrete column handles all the below-grade work: it resists rot, handles moisture, and transfers the load to the soil. The wood post then connects to the top of the concrete column at grade level, keeping the wood completely out of the ground.
Why it matters: This is the best of both worlds. You get the structural performance of an in-ground post installation with the longevity of a system that eliminates wood-to-soil contact entirely.
| Method | Wood-to-Soil Contact | Rot Risk | Uplift Resistance | Relative Cost | Best For |
| In-Ground Posts | Yes | Medium to High | Excellent | Lowest | Standard builds, dry soils |
| Posts on Concrete | No | Very Low | Depends on anchor | Medium | Well-engineered builds |
| Perma-Column | No | None | Excellent | Medium-High | Long-term builds, wet climates |
How Deep Do Pole Barn Posts Need to Go?
Post depth is determined by two factors: frost depth and structural load requirements.
Frost Depth
In cold climates, the ground freezes to a certain depth each winter. If a post or footing is placed above that depth, frost heave (the expansion and movement of frozen soil) can lift and shift the structure over time. Building codes require footings to extend below the local frost line.
- In northern Idaho, Washington, and Montana, frost depths commonly range from 36 to 48 inches or more.
- In Colorado, frost depths range from 36 inches in lower elevations to 48-plus inches at higher altitudes.
- In Oregon, frost depths vary widely, from 12 to 24 inches in western Oregon to 36 inches or more in high desert areas.
Your local building department can provide the required frost depth for your specific location. Always build to or below that depth.
Structural Load Requirements
For taller buildings, larger clear-span widths, and heavy snow or wind load areas, engineers may specify deeper post embedment or larger footing diameters to handle the additional forces on the structure. A 60-foot wide clear-span building carrying heavy snow loads places significantly more demand on its foundation than a simple 30×40 equipment storage building.
Typical Post Depths by Region
| Region | Typical Frost Depth | Common Post Embedment |
| Northern Idaho / Eastern WA | 36-48 inches | 48-60 inches |
| Western Oregon | 12-24 inches | 36-48 inches |
| Eastern Oregon / High Desert | 24-36 inches | 42-54 inches |
| Colorado (Front Range) | 36 inches | 48-54 inches |
| Colorado (Mountain) | 48+ inches | 54-72 inches |
| Montana | 36-48+ inches | 54-72 inches |
Pole Barn Footings and Concrete Around Posts
Even on a basic in-ground post installation, concrete plays an important role around and below each post.
Concrete Collar vs. Dry Pack
Concrete collar: The most common method. Concrete is poured around the post after it’s set and plumbed. This locks the post in place and creates a tapered surface at grade that sheds water away from the wood. It also significantly improves uplift resistance by creating a large anchor mass below grade.
Dry pack or gravel: Some builders use compacted gravel instead of concrete around posts. This allows drainage around the post base, which can actually reduce moisture accumulation in some soil types. It provides less rigid fixity but is sometimes used in well-draining sandy soils. This is less common and less often recommended for structural performance.
Bell-Bottom Footings
For buildings with significant uplift concerns (such as tall buildings, high-wind zones, or large clear-span widths) the post hole may be augered with a bell-shaped flare at the bottom. This creates a larger bearing surface underground that resists both vertical downward loads and upward wind forces. Bell-bottom footings are sometimes required by engineering specifications or local code in high-demand applications.
Concrete Around Perma-Column
Perma-Column units are set in an augered hole and concrete is poured around the precast column to lock it in place, just like a traditional in-ground post installation. The difference is that the wood post sits on top of the Perma-Column unit at or above grade level, never touching the soil.
Pole Barn Floor Options
The floor is a separate decision from how the posts are set, but it’s closely connected to how you’ll use the building. There are three main options.
Gravel Floor

A gravel floor is the most basic and most affordable option. A base of compacted gravel is spread across the interior, typically 4 to 6 inches deep over the native soil, sometimes with a layer of geotextile fabric underneath to prevent weed growth and limit soil migration upward.
Best for: Equipment storage, hay storage, livestock barns, or any use where drainage through the floor is desirable. Gravel is also easy to modify or add to over time.
Drawbacks: Difficult to keep clean, not suitable for vehicles with low clearance or use cases that require a level hard surface, and provides no vapor barrier between the soil and the building interior.
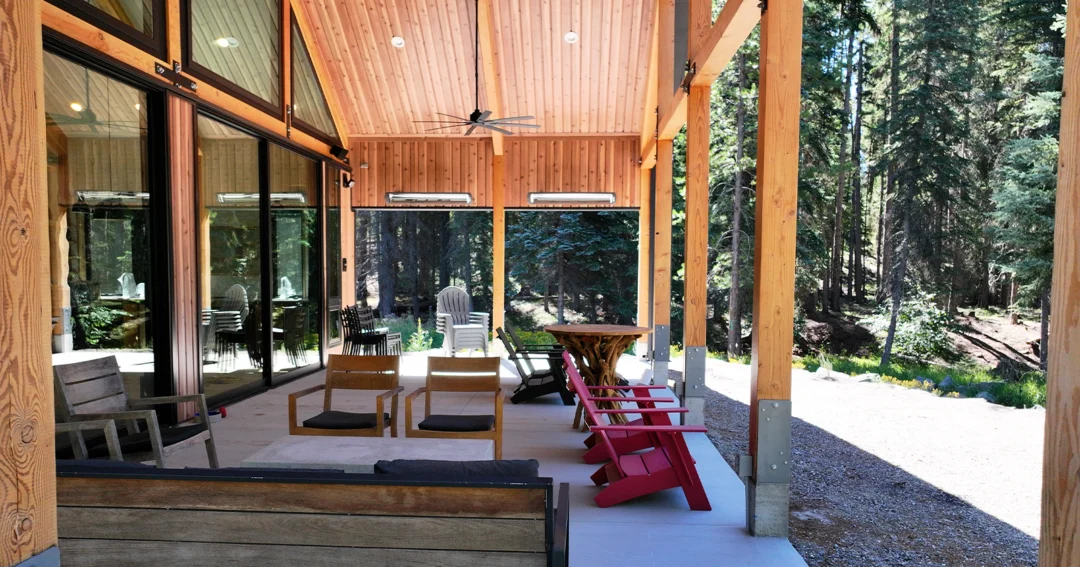
Concrete Slab
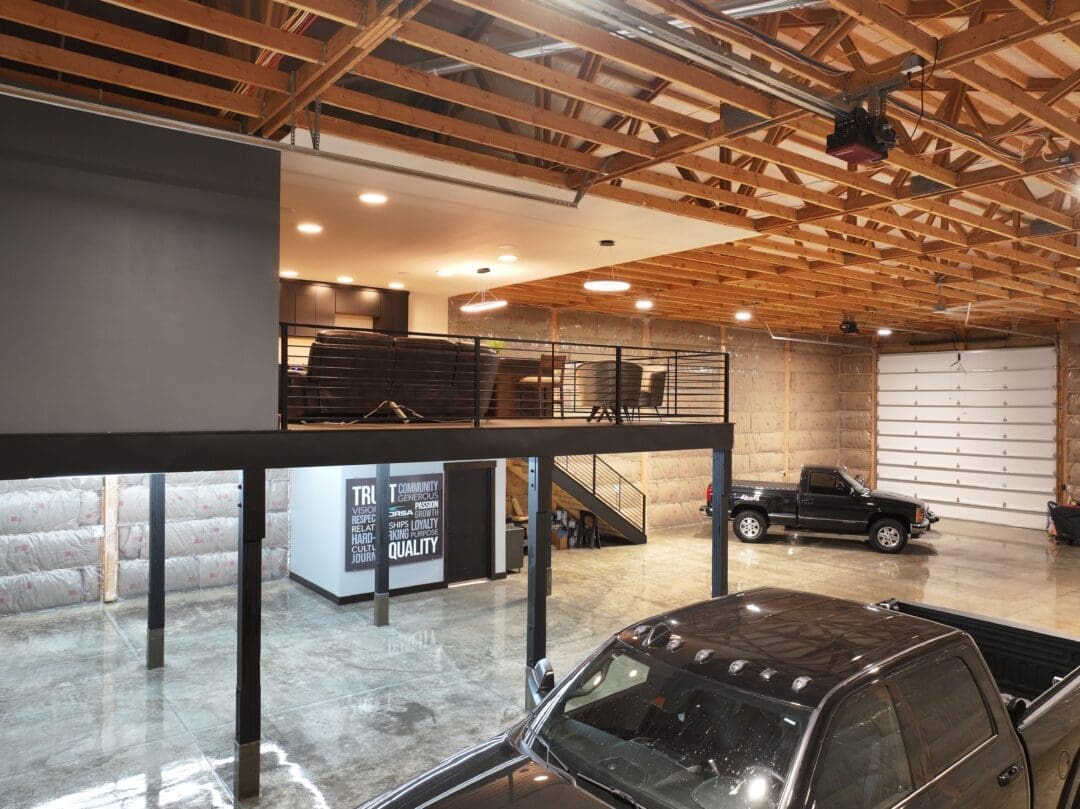
A poured concrete slab is the most popular choice for garages, shops, contractor buildings, and any pole barn that will be used as a workspace. It provides a hard, clean, level surface that’s easy to maintain and works with vehicle traffic, floor drains, lifts, and wall-mounted equipment.
Concrete Slab Thickness for Pole Barns
Slab thickness depends on the intended use:
| Use | Recommended Thickness | Notes |
| Light storage / hobby shop | 4 inches | Standard residential slab thickness |
| Vehicle parking / garage | 5-6 inches | Accounts for vehicle weight |
| Contractor shop / heavy equipment | 6 inches | Rebar or fiber reinforcement recommended |
| Commercial / industrial | 6-8+ inches | Engineer specification recommended |
Post Considerations with a Concrete Slab
When a pole barn will have a concrete floor, the posts are typically set first, then the slab is poured after framing is complete or during construction. There are a few important considerations:
- Post locations need to be accounted for in the slab design, particularly if thickened edges or footings are poured around the post bases.
- Vapor barriers (poly sheeting) are typically placed beneath the slab to prevent moisture migration from the soil into the concrete.
- Rebar or wire mesh reinforcement significantly improves slab performance and is worth the added cost in any working shop or garage.
- Control joints (scored lines in the slab surface) are cut to direct cracking as the concrete cures and shifts seasonally.
Gravel Base with Future Concrete Option
A common middle-ground approach is to set the building on a compacted gravel base initially, leaving the option to pour concrete in the future. This reduces the upfront cost while still allowing for proper drainage during construction and early use. If you know you’ll eventually want a concrete floor, it’s worth planning for it from the beginning by ensuring adequate gravel depth and a clean, well-compacted base.
Site Preparation for a Pole Barn Foundation
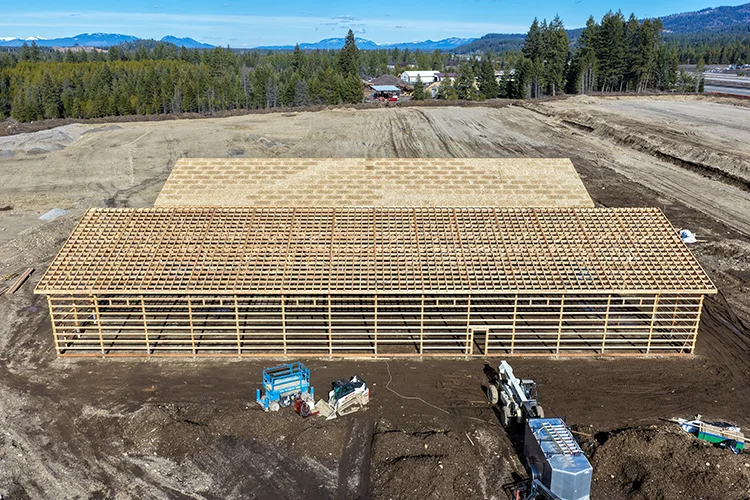
Site prep is the step that most buyers underestimate, and it’s one of the most important things that affects how well your foundation performs over time. A perfectly installed post set in poorly prepared, waterlogged ground will still have problems.
What Site Prep Involves
Proper site preparation for a pole barn typically includes:
- Land clearing: Removing trees, brush, stumps, and organic material from the building footprint and immediate surrounding area.
- Grading: Establishing a level surface for the building pad while also creating positive drainage so water flows away from the structure rather than pooling around the foundation area.
- Excavation and cut/fill: In sloped sites, the ground may need to be cut down on the high side and built up on the low side to create a level pad. Fill material needs to be compacted in lifts, not dumped and left loose.
- Drainage planning: Swales, berms, or French drains may be needed to redirect water away from the building site in areas with high water tables or poor natural drainage.
- Gravel base installation: For buildings with gravel floors or as a base layer under future concrete, a compacted crushed stone base is typically installed after grading.
Why Drainage Matters So Much
Water is the single biggest enemy of any pole barn foundation. Even pressure-treated posts set correctly in concrete will degrade faster in constantly wet soil. Water pooling around the building’s perimeter accelerates post rot, undermines compacted gravel bases, and causes frost heave in cold climates.
Good drainage doesn’t have to be expensive. In many cases, simple grading that creates a 2 to 4 percent slope away from the building is enough to dramatically reduce moisture issues around the foundation. On sloped lots or in low areas, more engineered solutions may be needed.
Building Pad Compaction
If your building site requires fill material to level the grade, that fill must be properly compacted. Loose or poorly compacted fill will settle over time, which can cause uneven slabs, shifting gravel floors, and stress on post embedment. Compaction is typically done in 6 to 8 inch lifts using a plate compactor or roller, with each layer achieving a specified density before the next is added. Skipping this step is a common mistake on DIY site prep projects.
Building a Pole Barn on a Full Concrete Slab
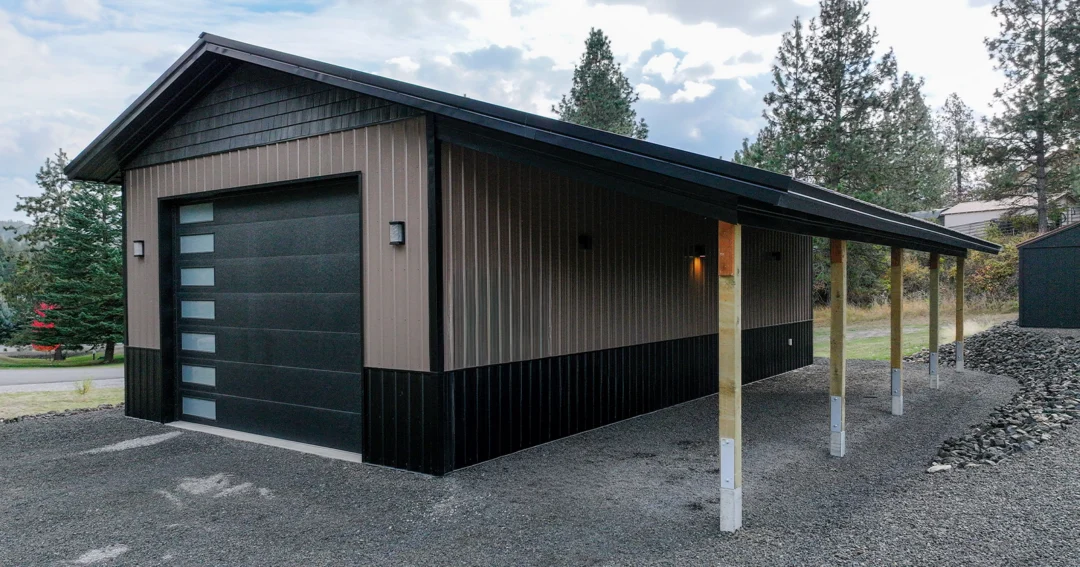
Some builders choose to pour a full perimeter concrete slab first, then set posts on or into that slab. This approach is more common in commercial and industrial applications but is occasionally used for residential shops and garages as well.
Embedded Posts in Slab
In this approach, post sleeves or anchor brackets are set into the concrete slab during the pour. The posts then mount into the embedded anchors. This keeps wood above the slab surface entirely and provides a clean, professional installation. It requires very accurate placement of anchors during the pour, since errors are difficult to correct after the concrete sets.
Surface-Mount Brackets on Slab
Post bases can also be bolted to a finished slab surface using surface-mount column brackets. This approach is commonly used in post-frame horse arenas, commercial buildings, and some barndominium builds. Uplift resistance relies on the anchor bolt pattern and the slab thickness, so engineering is important here.
Perma-Column on a Slab
Perma-Column units can also be used in conjunction with a concrete slab. The precast concrete column is set in the ground at the building perimeter, and the slab is poured to meet it. The wood post connects to the Perma-Column above the slab surface. This gives you all the benefits of the Perma-Column system along with the clean appearance of a finished slab.
Pole Barn Foundation Cost Overview
Foundation costs vary significantly depending on your site conditions, chosen system, and the size of the building. Here’s a general ballpark for planning purposes.
| Foundation Component | Typical Cost Range | Notes |
| Site grading and clearing | $1,500 – $10,000+ | Varies widely with site conditions |
| In-ground post concrete (per post) | $75 – $150 | Concrete collar and footing |
| Perma-Column upgrade (per post) | $200 – $400+ | Per column unit, installed |
| Gravel floor (4″ base) | $1.50 – $3.00/sq ft | Material and compaction |
| Concrete slab, 4″ | $5 – $8/sq ft | Material and labor, varies by region |
| Concrete slab, 6″ reinforced | $8 – $12/sq ft | With rebar and vapor barrier |
These ranges are intended as planning estimates only. Actual costs depend on local labor rates, material pricing, site conditions, and the specific specifications for your project.
Foundation Requirements and Building Permits
Pole barn foundation requirements are typically governed by local building codes and, in some jurisdictions, by state-level adopted codes like the International Building Code (IBC) or the International Residential Code (IRC). Key requirements that affect foundation design include:
- Frost depth: Posts and footings must extend below the locally adopted frost depth.
- Post embedment depth: Many codes specify minimum embedment depths based on building height and loading conditions.
- Soil bearing capacity: The size of the footing may be specified based on the bearing capacity of the soil on your site. Expansive clay soils and soft fill areas may require larger or deeper footings.
- Wind uplift design: In high-wind regions, post embedment, concrete anchor design, and connector hardware must meet specific load requirements.
- Snow load: In high-snow-load areas, the foundation system must be designed to handle the compressive and uplift forces generated by heavy roof snow loads.
For more on the permit and code process for pole barns, see our permit guide here.
How to Choose the Right Foundation System
There’s no single “best” foundation approach that works for every project. The right choice depends on your specific situation.
Choose In-Ground Posts If:
- You’re building in a well-draining, sandy, or gravelly soil
- You want the lowest upfront foundation cost
- The building will primarily be used for equipment storage or agricultural use where a 20 to 30 year lifespan is acceptable
- Your site is in a lower-moisture environment
Consider Perma-Column If:
- You want the building to last 50 years or more with minimal foundation maintenance
- Your site has heavy clay soil, high moisture, or poor drainage
- You’re building a shop, barndominium, or any structure with significant finished interior investment
- You want the peace of mind that comes from eliminating the single biggest failure point in post-frame construction
For Your Floor:
- Gravel: Best for livestock barns, hay storage, simple equipment shelters, or where drainage through the floor is needed
- Concrete: Best for garages, shops, any building where vehicles will be driven in, or any space that will be insulated and finished
- Gravel with future concrete: A smart option when budget is the primary constraint but a finished floor is the eventual goal
How Steel Structures America Handles Foundations
At Steel Structures America, we build post-frame and metal buildings throughout Idaho, Washington, Oregon, Colorado, and Montana. Every project starts with a site evaluation, and foundation recommendations are made based on your specific soil conditions, climate, intended use, and budget.
We are a licensed Perma-Column installer and a firm believer in the system for any building where longevity and performance matter. If you’re building a shop, a barndominium, a contractor yard, or any structure where quality of construction is a priority, we’ll walk you through the Perma-Column option as part of your quote.
Have questions about what your site needs before you build? Contact Steel Structures America at (800) 833-9997 or fill out our quote request form to start a conversation.